From Initial Inspection to Final Shipping in 5 Steps – De-installing a Phillips Brilliance 64 CT
Do you know how to dismantle and move your 2000 kg heavy CT scanner, like a Philips Brilliance, from its current location and onto a truck parked outside your facility?
If you don’t, that is totally fine. Because when we buy a system, we also handle all the details related to planning and executing a successful de-installation of the system. Making everything as easy for you as possible.
Buying and selling used diagnostic imaging equipment are not as simple as unplugging and rolling the equipment out the door and onto a truck. Anyone who has been a part of such a process can testify to that.
How do we handle this huge task at FlexRay Medical? In this blog post, we give you a tour behind the scenes. We walk you through the process of planning and executing a removal of a Philips Brilliance 64 CT-scanner, from a Scandinavian hospital.
We have shared a bit of this story before in our mini-series on LinkedIn. If you want the short version, you can get that there.
1 Initial Action
The planning work begins even before the initial on-site inspection. We begin by preparing ourselves by looking into the OEMs manual for the correct handling of any given system. In this case the Philips Brilliance 64 CT.
Using and ordering the correct tools and transport devices is all part of ensuring a smooth process and safe removal of the system. We always take the time to ensure we bring essential brackets for securely locking the system into the transport position.
The essential information for the planning process is often found in the pre-installation manuals, installation manuals and site planning guides. Each specific system has its manuals and guides.
For the Philips Brilliance 64 CT-scanner, we use a kit consisting of a special transport device/wheelset, a plate bracket to lock the rotation of the gantry. We also use 4 pieces of bolts to lock the tilt of the gantry and a stabilizing jack. The bolts and the jack ensure the gantry bearing is not damaged during transportation.
Diagnostic imaging equipment is often heavy and sensitive machinery. So, to ensure that we can perform safe and correct removal of the systems, we always “do our homework” before the initial inspection.
With these things in place, we are ready to continue with the initial on-site inspection.

2 On-site Inspection
The de-installation of a used CT system is one very small part of the process of replacing an existing system with a new system. The process as a whole involves many stakeholders.
That is why we always aim to perform the initial inspection well ahead of time. We know the importance of all parties being well prepared and on time, with their part of the work.
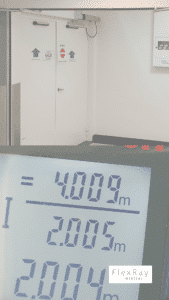
A crucial part of the initial on-site inspection is to walk through the outtake route of the system. We measure each door, elevator and passage and determine which departments along the route can be affected by the removal of the system.
This way we verify that the suggested route indeed is suitable. We also make sure to inform the affected apartments about when and where we need to pass through with the large and heavy components.
On this particular project, one door was less than the required 2032 mm. Because of that, we had to set aside extra time to remove the gantry top, back and front covers. By doing so we were able to reduce the height of the gantry and pass-through this particular door.
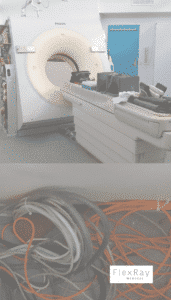
At the on-site inspection, we also confirm where all the cables for the system run. Sometimes they run beneath the scan room floor in dedicated cables, ducts or pipes. In this case, the cables ran through the floor and down to the department downstairs and placed in cable trays above the suspended ceilings.
This meant that an additional department of the hospital was actually affected by the removal work. We then had to coordinate a time for accessing these cables of the Philips Brilliance, with this particular department.
We also investigate specifics for the parking area for our truck along with the accessibility along with the outtake route. Taking conditions during and after normal working hours into consideration.
Knowing each one of these details makes it possible to make all the necessary arrangements ahead of time. Careful planning often takes quite some time. In the end, it saves a lot of time in the de-installation process that everyone involved knows exactly what we do, when and where.
At the actual de-installation, it also ensures that we avoid unpleasant surprises.

3 Detailed Planning
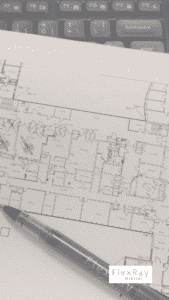
Back at the office we transform all this data into writing and create the game plan for the de-install. Included are all findings and agreements made on-site during the inspection. We also map the exit route on a floor plan and document with extra pictures from the route.
An essential part of this particular project with the Philips Brilliance was to complete the agreements with each department affected by the removal works. We had to ensure that we had a green light to work at certain times during the day, at the different departments.
Moreover, at one part of the gantry removal route, the floor could not bear the direct pressure of the weight of the gantry and transport wheels. To handle this we planned to bring thick aluminium plates. This way distributing the weight evenly on the floor at this particular part.
Also, we had to pass through the hospital’s temporary COVID-19 emergency reception. So, we had to stay in contact with the pre-hospital services during the day. This to ensure not to bring any large component through the department when a suspected COVID-19 patient would be received. This meant we had to wait until the day of the removal to agree on a small part of the schedule.
When working in areas with an added risk of spreading infections or diseases, we always follow the local guidelines from the hospital. Especially on PPE (Personal Protection Equipment) and the like.
For each project, we always share with the hospital and all involved parties a document listing the following details:
- Which system we remove
- Site and location details
- Time schedule
- A check-list for the customer/hospital, to prepare for our work on site
- Contact details of involved persons
We also share relevant attachments like:
- Outtake route report
- System component weights and dimensions
- Notes about which special permissions we need to have in place
With all these details well documented, we ensure that all parties involved are in agreement with the plan and well prepared for their part of the process.

4 Day of de-installation
We begin in the morning with one final test, to make sure everything is as it should be and that the scanner is still within OEM specifications. These tests require that the CT is still connected to power at our arrival.
Following the last QA test of the system, we begin with removing the gantry floor bolts. On this particular model, we need to use the tilt function of the gantry to loosen the floor bolts. Without any power to the gantry, we are unable to remove these bolts and unable to remove the actual system.
We always agree with the hospital to keep the system connected to the power grid to perform the last tests. As in the case with this Philips Brilliance, most systems also need us to still have the system powered on, to bring the system into the correct transport position. Then our engineers tell the local electrician when to isolate the power supply to the system.
After isolating the power supply we loosen the floor bolts of the gantry and patient table. Then we finally bring the system into the correct position for transport. Next, we mount the transport wheels onto the CT gantry.
When the gantry and table are on wheels and ready to move, we pack all the smaller components and electronics from the system.
At the agreed time we begin to move the CT gantry and table via the designated outtake route, making sure the coast is clear. Finally, we load these onto the truck at the agreed loading and parking area.
The last that remains is to remove all cables from the cable trays. In this case, we did this after working hours. This way we avoided disturbing the department below the scan room, where we had to remove the ceiling, to access the cable trays.
At the end of an around 11-hour long workday, the complete system is loaded on the truck. We sweep the empty room and the truck and personnel leave for the warehouse. Everything on time and as planned.

5 Shipping
When we sell the system to a new customer, the last step in the process takes place at our warehouse. Here we check the complete system and prepare it for packing.
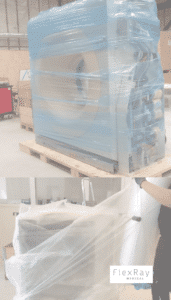
After all that care and effort in planning and carefully de-installing the system, this final part is also not a place to cut corners. We package the system precisely and all its components. Using internationally approved materials, suitable for the shipping method, which the customer chooses.
E.g. if shipping via sea or air, we use vapour barriers to protect the equipment during transit. This ensures that no moisture reaches the sensitive electronics of the system. There is a possibility that this can cause corrosion and electronic failure in the system.
The final and outer layer is a customised wooden crate. This protects every component of the CT system and makes it suitable for international freight.
After this, the Philips Brilliance, or another system, is shipped and on its way to the new owner, where it will help serve many more patients in the coming years.
Simon Dyrup Nielsen
CEO & partner
(+45) 2627 2879 (cell)
sdn@flexraymedical.com
